
AGENT RESOURCES
The Ultimate Pre-Shoot Checklist: How to Get Your Listing Photo-Ready
2026 guide • 6 min read • By Jason Koford
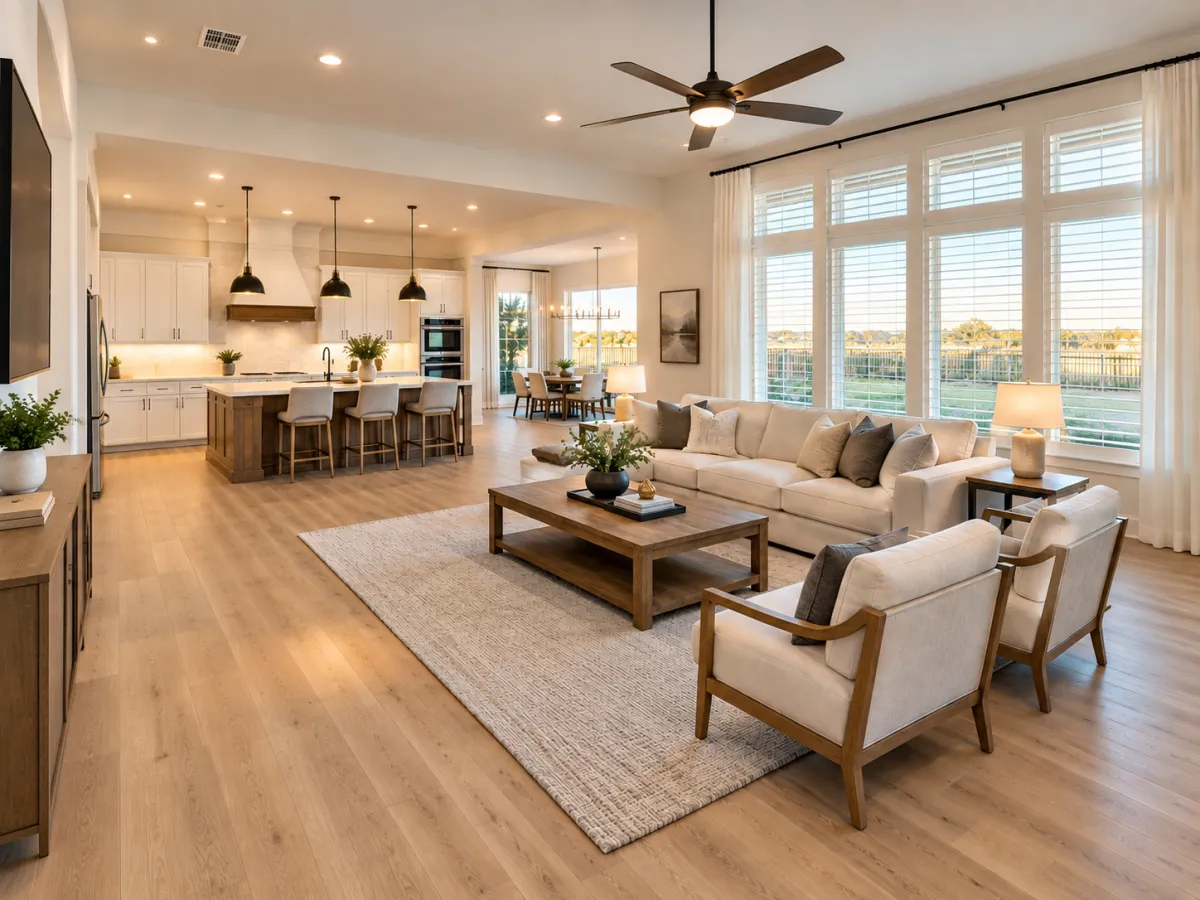
Great listing photos start long before the camera comes out. The difference between photos that make buyers stop scrolling and photos that get skipped over often comes down to prep work done in the days leading up to the shoot.
As an agent, walking your sellers through a clear pre-shoot checklist can save everyone time, prevent reshoots, and help your listing make the strongest first impression possible. Here's a complete breakdown you can share with clients before their next photography appointment.
Everything below is split into two lists: what needs to happen in the days before the shoot, and what takes a few minutes on the morning of. Send the first list when the shoot is booked and the second the night before.
Interior: Plan Ahead
Before the day of the shoot, sellers should take care of a few bigger-picture items. Handling these early prevents last-minute scrambling and ensures the home looks its best from the moment the photographer walks in.
Interior prep
3–7 days before- Complete any paint touch-ups
- Make sure all areas are in show condition
- Stage any rooms that need it
- Confirm all light bulbs work and replace any that are broken
- Clean light bulbs to remove dust
Interior: Day of Photography
On shoot day, a few quick adjustments make a big visual difference. A clutter-free, well-lit interior photographs dramatically better and helps buyers picture themselves in the space.
Interior walkthrough
Morning of the shoot- Turn on all lights
- Open blinds, curtains, and drapes, and set blinds to open
- Clean windows so there are no smudges or marks
- Remove items from the refrigerator exterior
- Empty sinks and wash dishes
- Turn off ceiling fans
- Put away or crate pets
- Remove pet bowls, litter boxes, and toys
- Close toilet seats
- Clear countertops completely
- Tidy bedrooms, make beds, and store clothes out of sight
- Put away children's toys in storage or closets
- Store newspapers and magazines in bookshelves or drawers
- Sweep floors and vacuum carpets
- Minimize the number of people in the house during photography
Ceiling fans are the one people forget. A fan spinning during a shot turns into a blurred smear above the room, and it is the single most common reason an otherwise finished photo has to be retaken.
Exterior: Plan Ahead
Curb appeal matters just as much as the inside of the home. The exterior shot is usually the thumbnail a buyer sees first, so it carries more weight than any other frame in the set.
Exterior prep
3–7 days before- The lawn is cut and edged, weeds are pulled, and leaves are picked up
- All landscaping is finished
- Any exterior contract work is completed
- Gutters are cleaned
- The pool area is staged, with the pool and surroundings cleaned until sparkling
- Temporary child fencing is removed
- Pumps for waterfalls or spillways are turned on to boost visual appeal
- No showings are scheduled during the shoot
Exterior: Day of Photography
Right before the photographer arrives outside, a five-minute pass around the property clears everything that would otherwise have to be edited out or shot around.
Exterior walkthrough
15 minutes before- Remove all vehicles from the driveway
- Park down the street or in the garage
- Keep pets and people out of the yard
- Make sure the lockbox is accessible
- Hide garbage cans, hoses, and garden tools
- Roll up or conceal hoses
- Gather trash into outdoor bins, then move those bins out of view
- Close garage doors
- Minimize the number of people around during photography
Your Prep Timeline at a Glance
Share this timeline with your seller when the shoot is booked. It splits the checklist into what has to happen days in advance and what only takes a few minutes on the morning of.
| When | Area | What it covers | Why it matters |
|---|---|---|---|
| 3–7 days before | Interior | Paint touch-ups, staging, working and dusted bulbs | Anything requiring a trip to the store or a contractor |
| 3–7 days before | Exterior | Lawn, landscaping, gutters, pool, contract work | Yard work needs days to look settled, not freshly cut |
| Morning of | Interior | Lights on, fans off, counters clear, beds made, pets away | Determines whether rooms photograph open or cluttered |
| 15 min before | Exterior | Cars moved, bins hidden, hoses rolled, garage closed | Keeps the thumbnail shot clean and distraction-free |
Print this section or paste it into your listing appointment email so sellers have it in writing.
Why This Matters
Listing photos are often a buyer's very first impression of a home, and that first impression can determine whether they click through to learn more or scroll right past. A little preparation goes a long way toward making sure that first impression is a great one.
Share this checklist with your sellers ahead of their scheduled shoot so the property is ready to shine, and your photos come back looking exactly the way they should.
Agent tip: send the checklist twice — once when the shoot is booked, so the days-ahead items get done, and again the night before as a short reminder of the morning-of list. Two touches prevent almost every reshoot.
FAQ
How far in advance should sellers start prepping for a listing shoot?
Roughly a week. Paint touch-ups, staging, landscaping, and any outstanding contract work all need lead time, and freshly cut grass looks better after a day or two than it does an hour after mowing. The morning-of list takes about an hour.
What's the most common reason listing photos have to be reshot?
Preventable details in the frame — a ceiling fan left spinning, cars in the driveway, trash bins at the curb, or a room that was never cleared. None of those are photography problems, which is why a written checklist in the seller's hands is worth more than any editing pass afterward.
Should every light be on if the house already has good natural light?
Yes. Interior lights add warmth and depth that window light alone doesn't produce, and they keep lamps and fixtures from reading as dark spots. That's also why burned-out and mismatched bulbs should be replaced before shoot day.
Do pets really need to be out of the house?
Pets should be crated or off-site, and bowls, litter boxes, beds, and toys put away. Beyond keeping animals out of frame, it keeps the photos neutral for buyers who have allergies or simply don't want to picture a pet in the space.
Does the home need to be professionally staged first?
Not always. Full staging helps most in vacant homes and in rooms whose purpose isn't obvious. In an occupied home, decluttering, clearing countertops, and removing personal items usually does most of the work staging would.
How many people should be at the home during the shoot?
As few as possible. Every person in the house means a room to work around and a reflection to avoid in windows and mirrors. Schedule no showings during the appointment, and keep the yard clear as well.
What if the seller can't finish everything in time?
Prioritize the front exterior and the kitchen. Those two carry the most weight with buyers scrolling a gallery, and they're the hardest to fix after the fact. Let the photographer know what isn't ready so the shot list can be adjusted.
A prepared home photographs faster, needs fewer retakes, and gives you a gallery you can launch with confidence.
Kaptiv Media shoots real estate photography, video, and drone coverage across the Dallas–Fort Worth metroplex — shot by a licensed REALTOR® who knows what makes a buyer click.
Book a Shoot with KaptivGet Behind the Lens
Once a month, an inside look at the shoots, listings, and DFW market data shaping Kaptiv's work — plus the strategy top agents are using to sell faster.
No spam. Unsubscribe anytime.
Premium real estate photography, video, and drone coverage for the Dallas–Fort Worth metroplex.

PAGES
CONTACT
FOLLOW
© 2026 Kaptiv Media. All rights reserved.